Getting Started with Corvus
Access Corvus
Corvus can be found at https://corvuswildlifehealth.org
Corvus requires an account (user name and password). You can request access by contacting contacting the Corvus Team at (admin@corvuswildlifehealth.org).
If you are a NYS DEC employee, your account will be associated with your DEC email account.
Your account will be linked to your Organization and allow you to track specimens your Organization has submitted.
Set or reset your password
To set or reset your password, go to corvuswildlifehealth.org and click “Forgot your password?”. If you are a DEC employee, use yourDEC email to send a password reset link and follow the instructions in the email.
General Navigation
Main menu
On a large screen, the main menu will be displayed on the left side of the page by default.
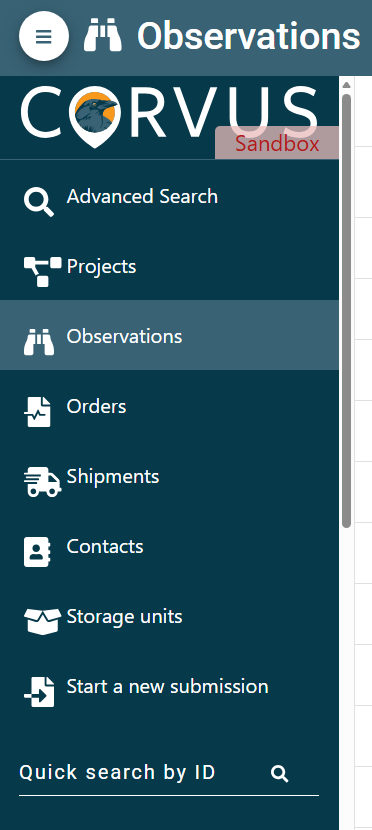
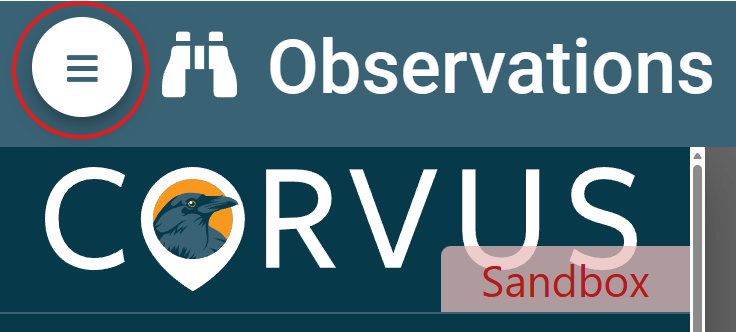
The menu can be hidden or shown by pressing the menu icon at the top left. On mobile devices, the menu is hidden by default. You can expand the menu by pressing the same menu icon shown above.
You can also navigate using the navigation bar at the top of the page. For example, when you are viewing a Sample, you can return to the Observation by clicking the Observation Tab (binoculars, date, number).
The Observation tab is a high-level overview of the event. To access an individual specimen’s data, click on the specimen number in the event to view the Animal tab..

My Account
Click the “Profile” icon on the top right ![]() to edit your profile and update your contact information
to edit your profile and update your contact information
If you need to update your Organization (e.g., you have changed Agencies or Regions) contact (admin@corvuswildlifehealth.org).
Submit Wildlife Health Event Observations and Specimens
We encourage wildlife health event observations to be entered into this database even if specimens are not collected for submission.
Before submitting a specimen, please review Specimen Submission Guidelines or use the Wildlife Outbreak Investigation Tool to determine if the specimen is of interest.
Click  in the menu on the left side of the page. This will open the Wildlife Health Event Reporting and Submission Wizard. The form will guide you through each step of the submission process. Use the “Next” and “Back” buttons at the bottom of the page to navigate through the form. Before finalizing the submission, you will review your information and can return to make edits if needed.
Warning: Incomplete Form
The warning icon ![]() will appear if required information is not completed. You must provide the required information to proceed to the next step during the submission process.
will appear if required information is not completed. You must provide the required information to proceed to the next step during the submission process.
Submission Instructions
Submitter Information
As a logged in user, your contact information will automatically be filled in as the “Submitter”.
Select a Case manager (either the NYSDEC Wildlife Health Unit in Delmar or the Cornell Wildlife Health Lab), which is the intended destination for the event report and shipped samples.
Other Contacts
Add additional contacts related to the event (finder, rehabilitator, etc.) by clicking the “Add” at the bottom right. This can be done multiple times to add multiple contacts if needed.
To add a contact, first check if the contact is already in the system by typing the contact’s name. If the correct contact is found, select them from the dropdown. If they are not in the list, they must be added to the system; select “Add new person” and enter the information.
After all contacts are added, click “Start Submission” at the bottom of the page to proceed.
Event Details
Enter the required information including the date the event started (often the date the animal was found dead) and history.
When the information is complete, click “Next” on the bottom left of the page.
Location
Indicate the location of the event using an address, a point on the map, or coordinates (latitude and longitude).
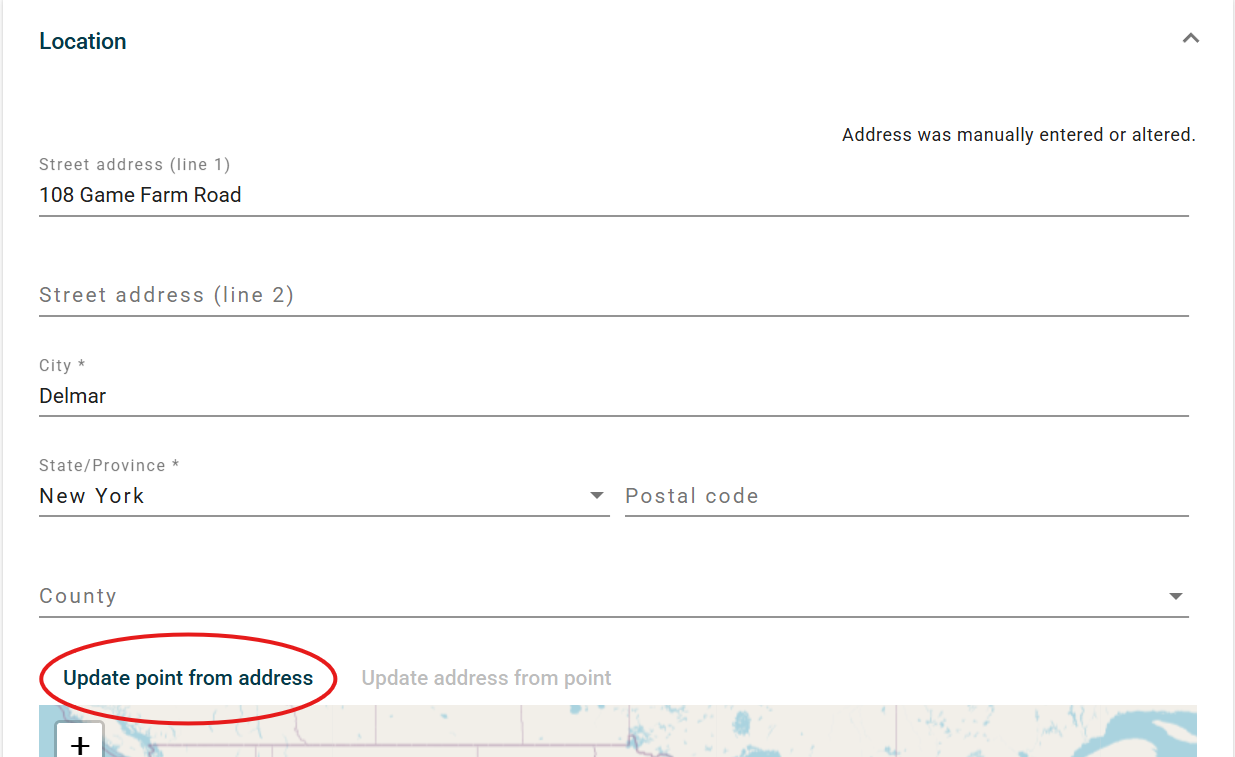
SET LOCATION BY ADDRESS
If you are starting with an address, provide all known address information, then click "Update point from address”.
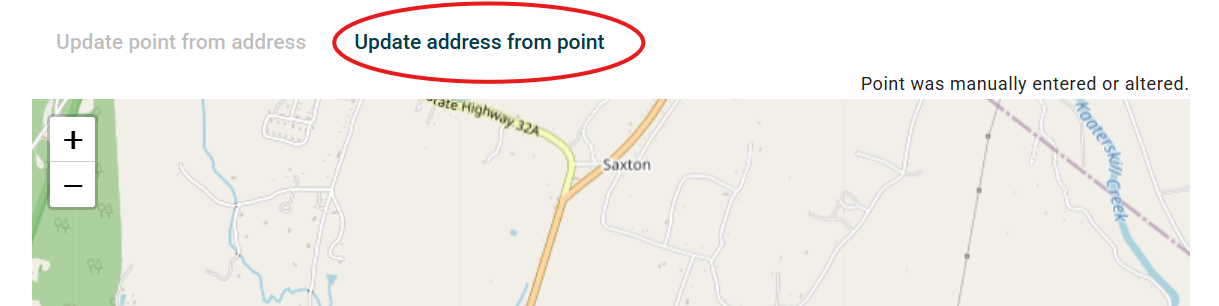
If the address information you entered was incomplete, press the "Update address from point" button to automatically fill in missing information, such as a blank Postal Code or County.
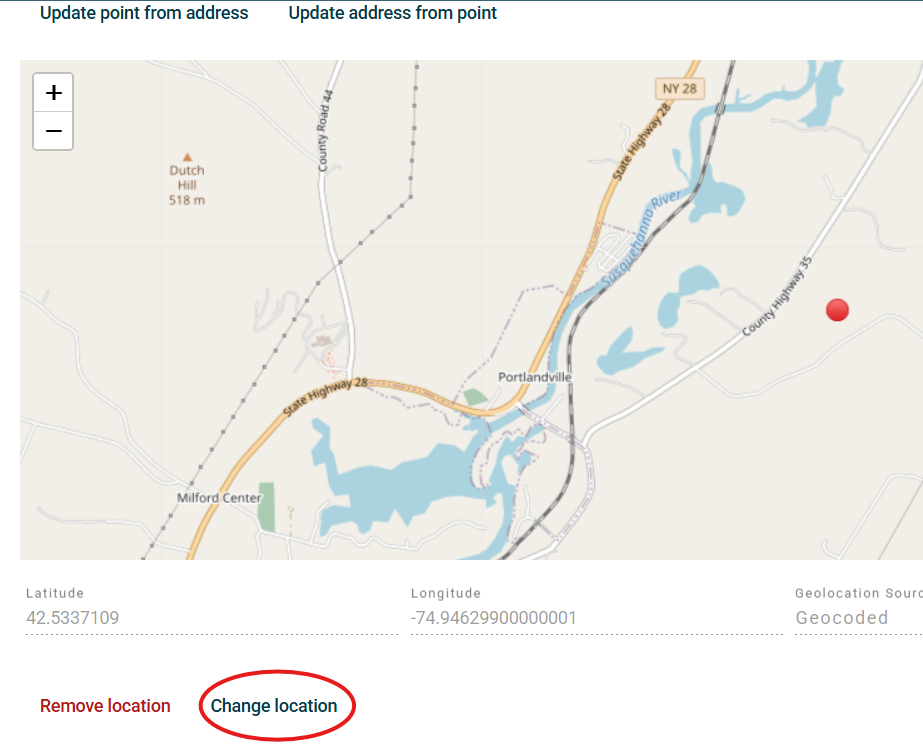
Confirm that the point on the map is correct. If a mistake is made, you can remove location by clicking “Remove location” on the bottom left under the map then make corrections needed to the address and update the point on the map again.
If the point needs to be moved or adjust, click “Change Location” under the map. Then navigate to the appropriate location and click the point on the map. The map does not support drag-and-drop, but instead simply click on the correct location. Be sure to click “Done”.
SET LOCATION BY CLICKING ON A MAP
Click the "Add Location" button under the map, then navigate to the location and click a point on the map.
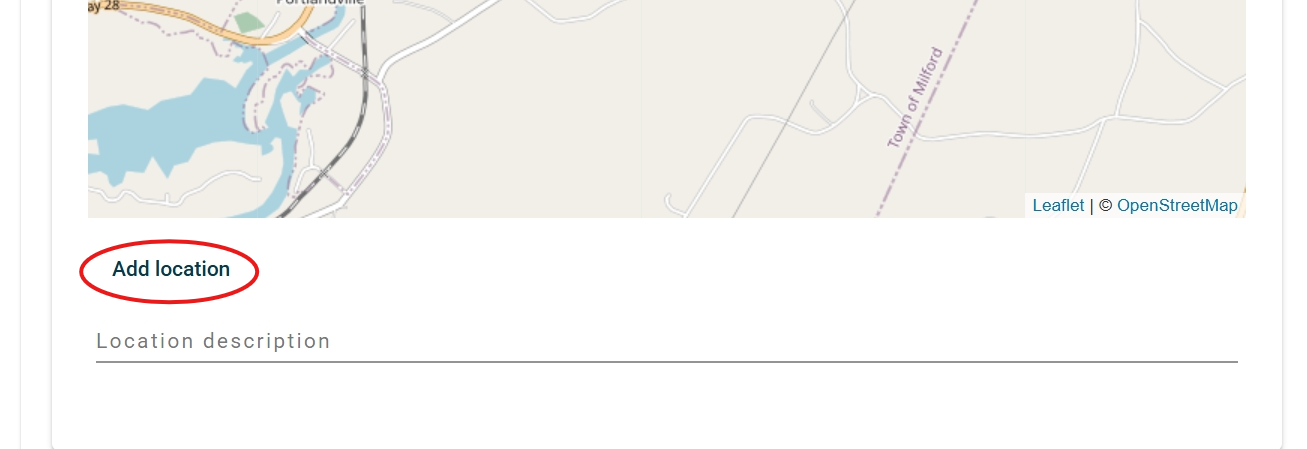
You can then retrieve the closest address to that location by clicking on "Update address from point" button above the map. Be sure to check this information for accuracy.
SET LOCATION BY COORDINATES
If providing coordinates (latitude/longitude) directly, click “Change Location” then click “Edit Manually”. Be sure to click “Done”.
You can then retrieve the closest address to that location by clicking on "Update address from point" button above the map.Be sure to check this information for accuracy.
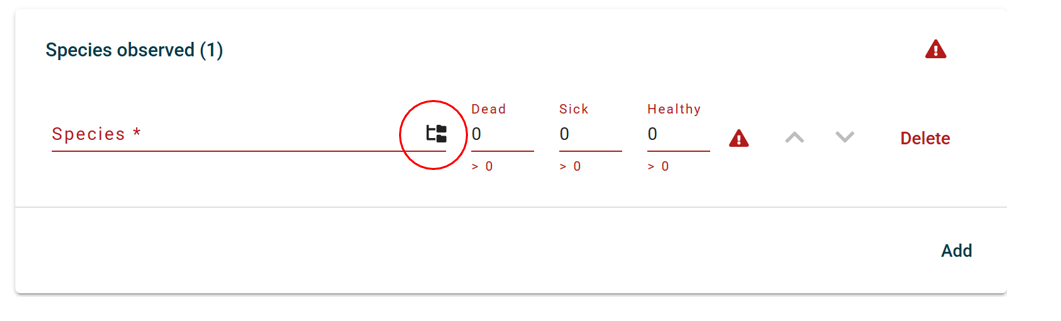
Species Observed
Indicate the species observed in the event, including animals that that were observed but will not be submitted for testing. More details can be provided about each animal in a later step.
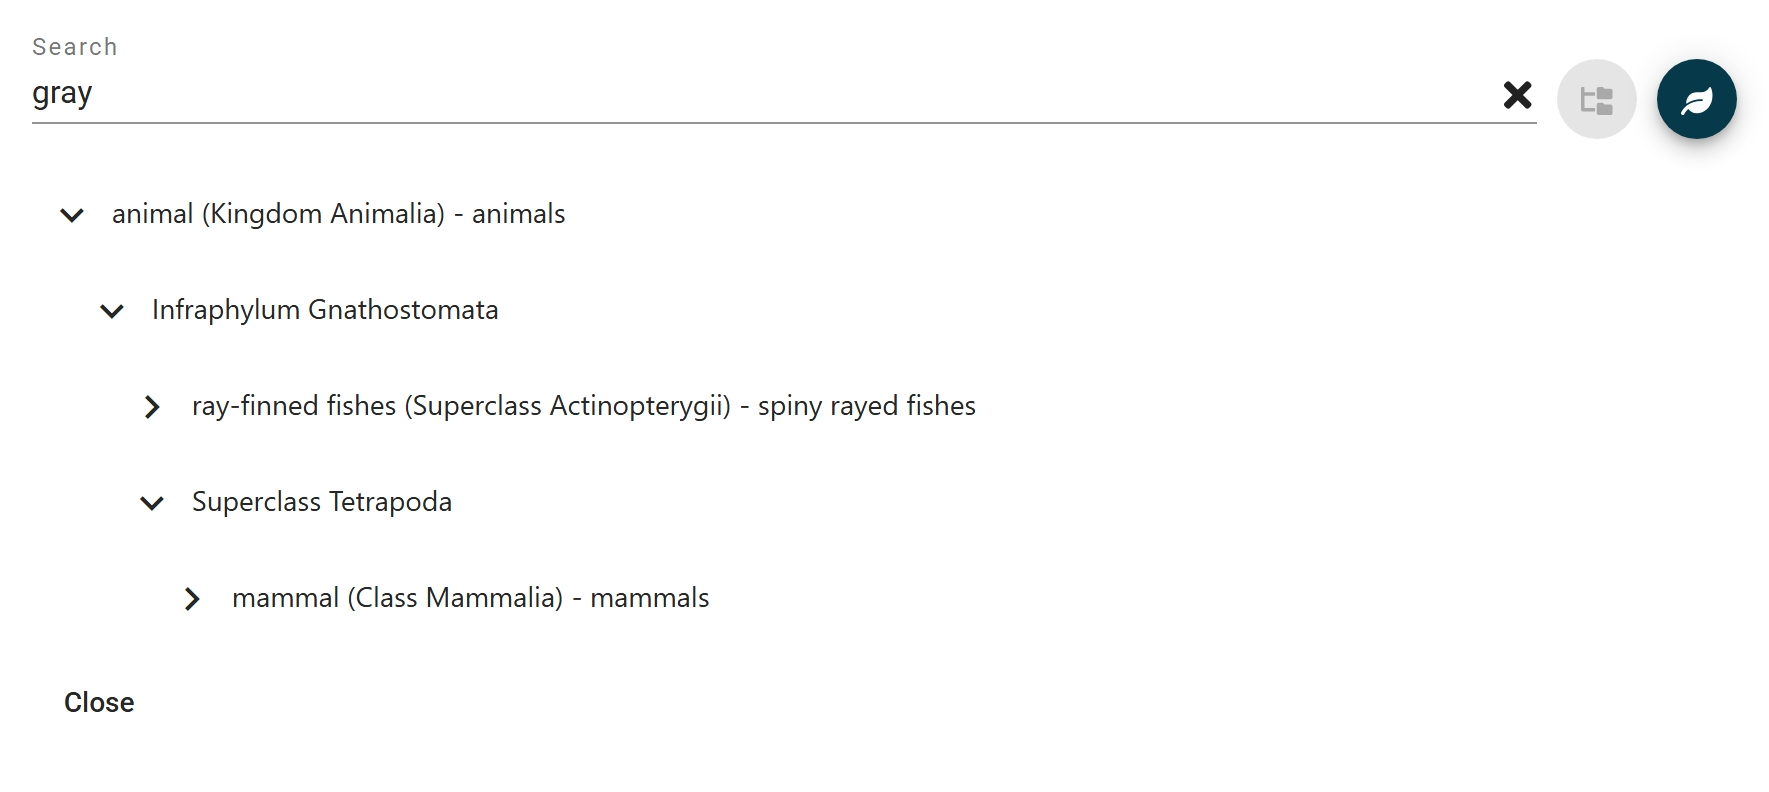
Start typing the species name and select it from the dropdown list. You can type in order, family, or genus if you are unsure of the species. If the species does appear, use the “Taxonomic Unit Helper” button to search through the taxonomic tree. To select a taxon, press the check box to the right of it.
To add additional species, click “Add” on the bottom right.
Enter the number of dead, sick, and healthy animals observed for each species entered.
Event Questions
If there are specific relevant questions related to your submission, you will see a page asking questions about the reported event. These questions are based on the species, geographic location, and other factors and reflect ongoing wildlife health surveillance activities and research.
This section will automatically be skipped if there are no relevant questions.
Attachments
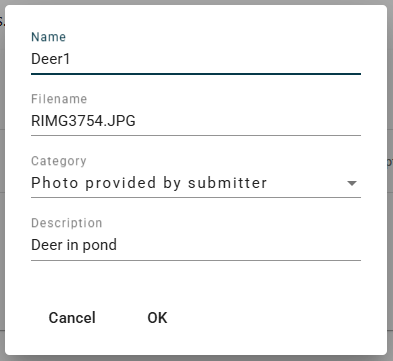
Click “Add attachments” on the bottom left to add photos, videos, audio files, or documents related to the event.
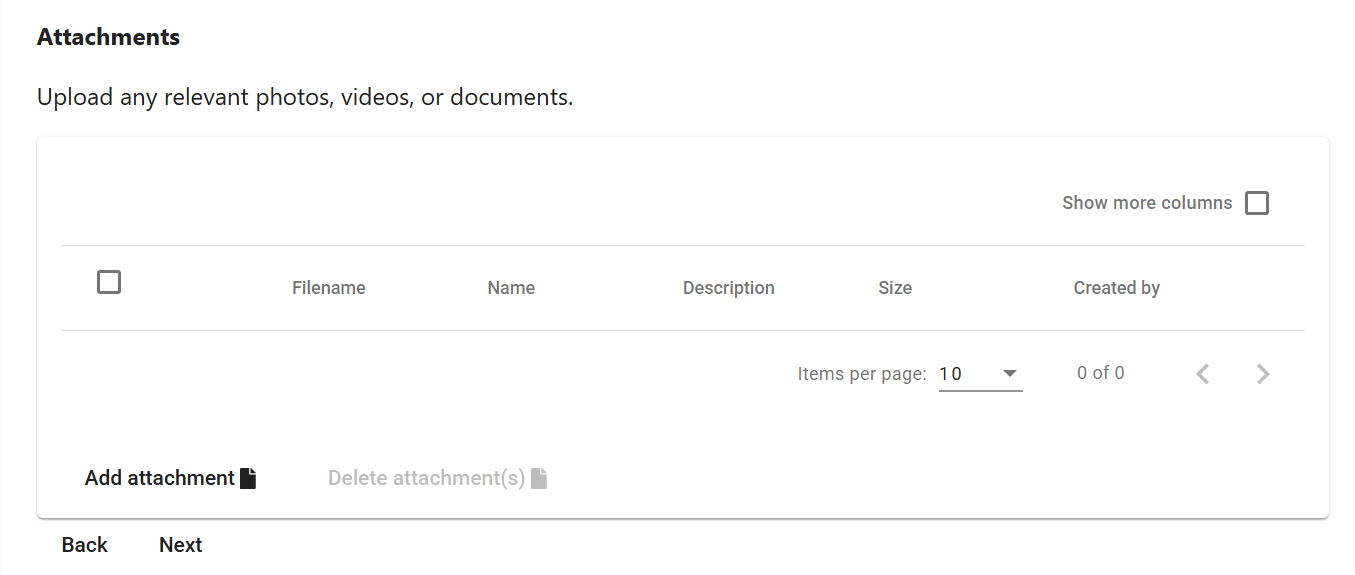
Name the attachments and select the category of attachment from the dropdown.
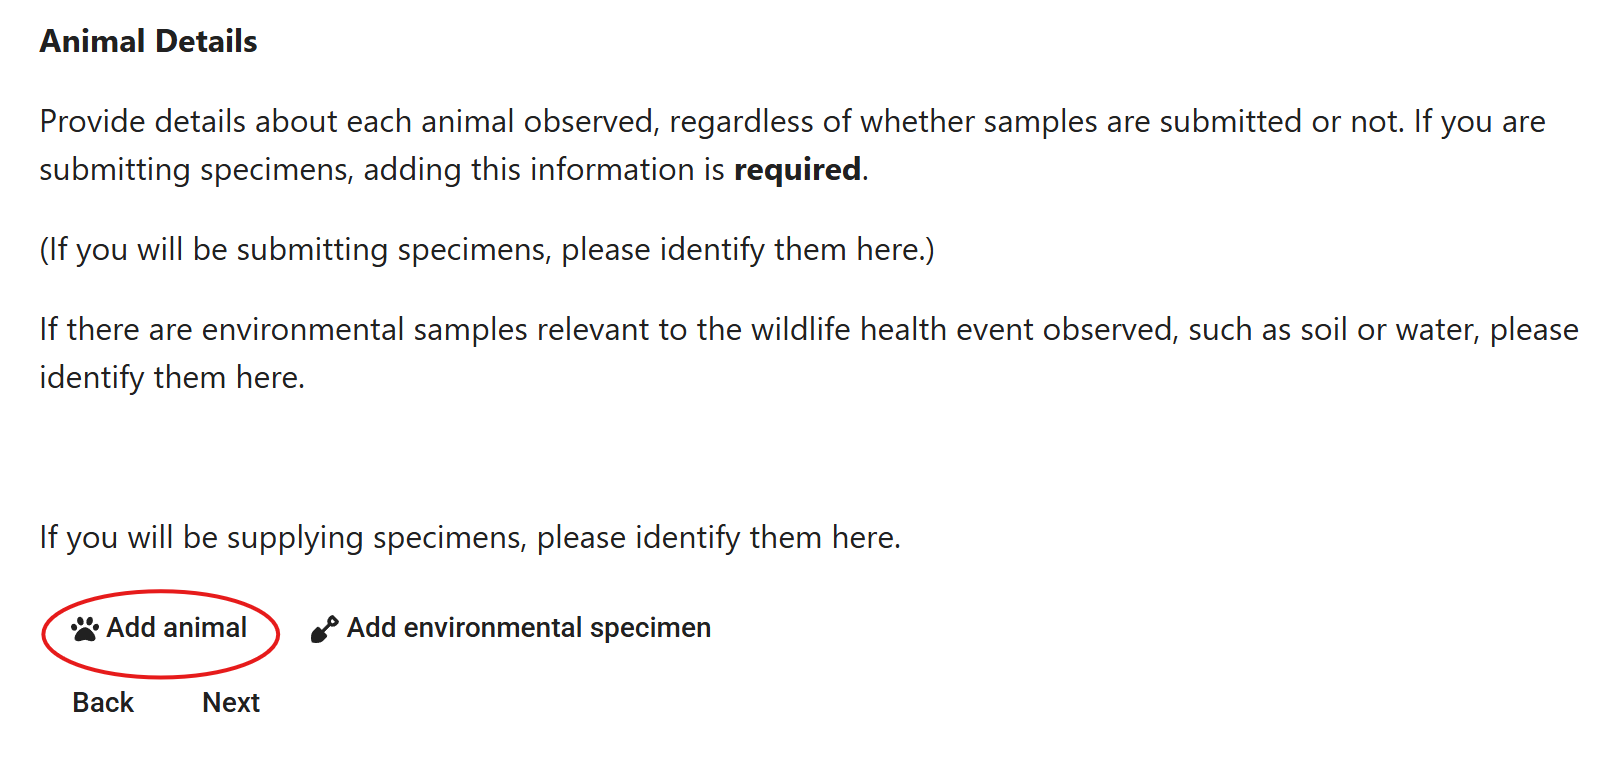
Animal Details
Provide specific details about each animal observed. This information should be added regardless of whether samples are submitted (e.g. if you saw three foxes with mange, but only collected one for submission, please describe all three here with as much information as possible).
Adding specimen information for specimens you are not submitting is encouraged, and is required for specimens that you will be submitting.
Environmental samples (water, soil) can also be added in this section using the “Add environmental specimen” button and the same process.
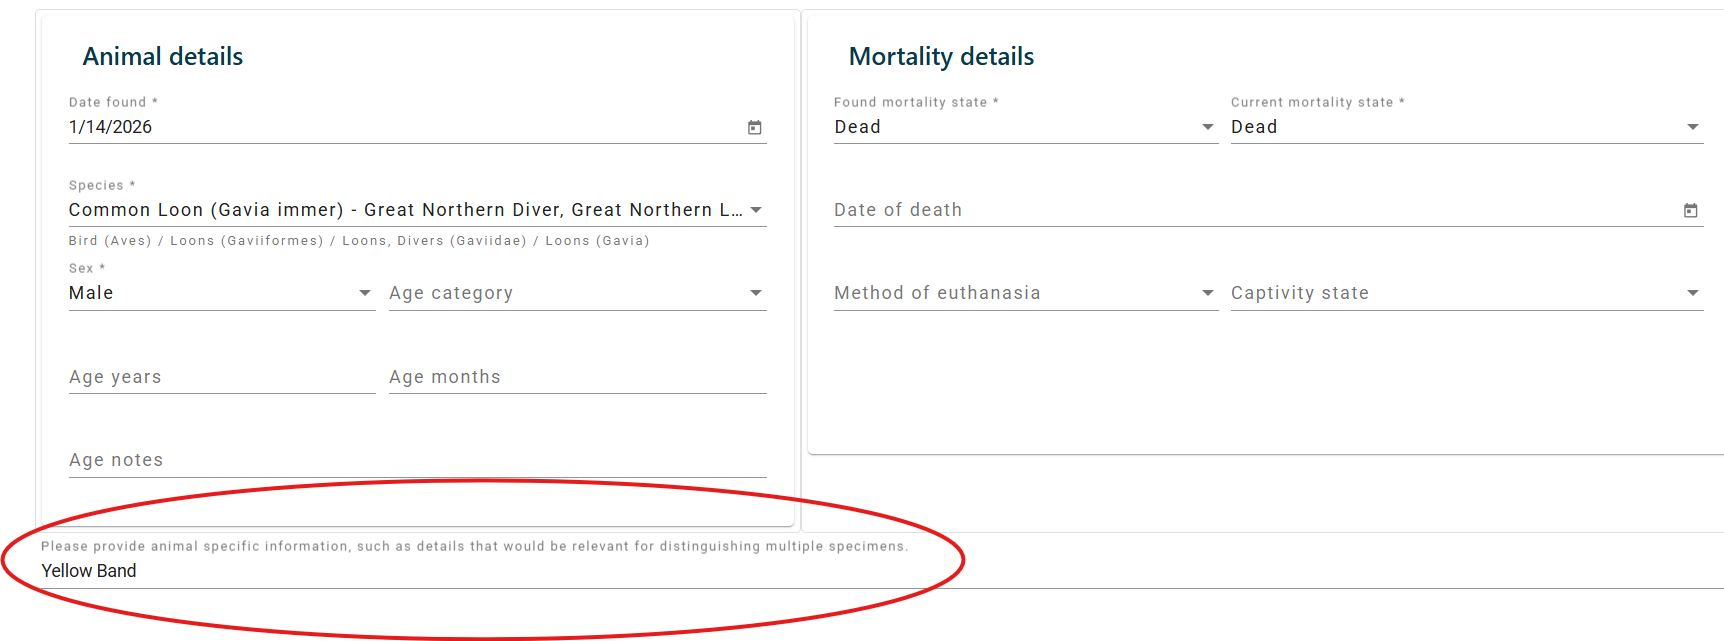
Enter as much information as you know into the fields. It is okay to leave unknown areas blank. There is a section at the bottom to provide animal specific information, which will help the lab distinguish which animal is which if multiple specimens are received (please indicate if they are marked in any way or have distinguishing features).
Specimen questions
For each specimen there may be specific questions that are relevant to this animal. These questions are based on information that you've entered into the submission form and are important for ongoing wildlife health surveillance activities.
This section will automatically be skipped if there are no relevant questions.
Animal Samples
If you are submitting a sample for this animal (typically a whole carcass), select the type of sample from the dropdown. Select “Carcass” if you are submitting a whole carcass for necropsy. Then click “Add sample”. The sample will not be added to your submission unless you press the "Add sample" button.

If a sample is added, you will see it appear with a unique identifier and type. If you are submitting multiple samples for one animal (e.g. multiple organs), you can add multiple samples to one animal by continuing to pick the sample type from the drown down menu and clicking “Add sample”. If you do not see a NY number, you did not add a sample to the submission.

If no samples will be submitted for this animal, you can click “OK” without adding any.
Manage Samples
***Data cannot be edited after the chosen action is selected. ***
Displayed is a list of all samples entered for all animals. If you do not see all samples that you have plan to submit for this event, press the "back" button and correct the data as needed.
For each sample, indicate whether the sample will be submitted to the Wildlife Health Program immediately (shipped) or stored for later submission.
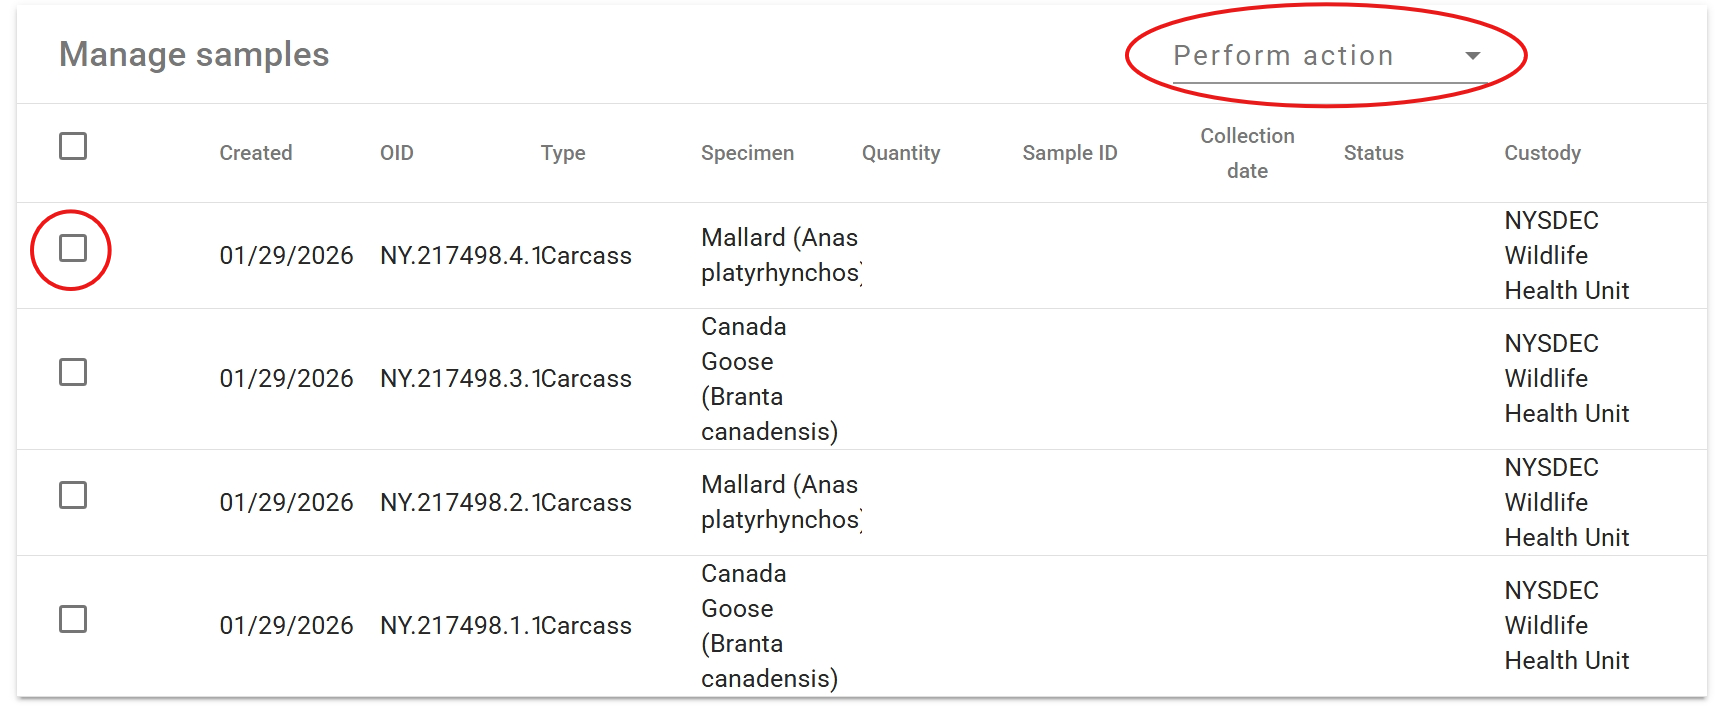
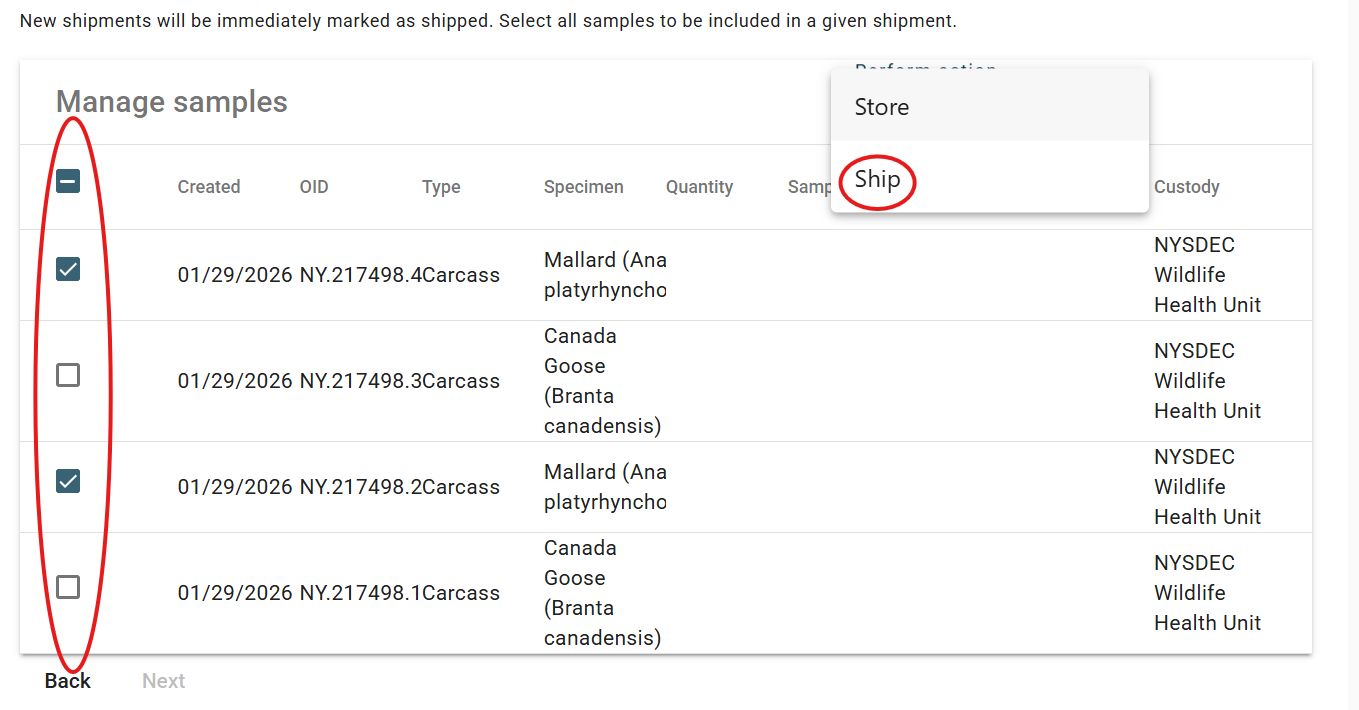
SHIP SAMPLES
Select all the samples you plan to ship immediately in a given shipment to the Wildlife Health Program by clicking the check boxes next to the samples. Once all the samples for a shipment are selected, click “Perform action” and select “Ship” from the dropdown.
You will be prompted to add shipping information. This should include where the samples are going (NYSDEC WHU in Delmar or Cornell Wildlife Health Lab), shipping method (UPS, FedEx, Hand Delivery), and tracking number if you have the tracking number (FedEx Tracking number).
STORE SAMPLES
If you are a DEC Regional employee and storing samples in your own freezer for some period of time prior to shipping, select all samples that will be stored under the same conditions (same freezer, container, etc). Click “Perform action” and select “Store” from the dropdown. You will be prompted to select the “Storage Unit”, which will be your Regional freezer, as well as as provide additional information useful for sample management in your freezers.
As needed, perform the same process for other stored samples.
After all samples are assigned actions (Ship or Store), proceed to Submission Review page.
Review
Review the submission summary and go back to make any necessary corrections. Your submission is only final once you click “Complete Submission”.
Print the submission form by clicking the printer icon. The top portion includes a summary of the observation. The bottom of the form provides labels which are required to be affixed to individual samples.
Every sample that is submitted must be labeled with the printed label from the submission or labeled with the unique identifier (NY Number).
You will also receive an email with the same summary and label(s).
For shipments going to the Cornell Wildlife Health Lab, please contact the CWHL staff at cwhl@cornell.edu with any additional questions.
For shipments going to the DEC Wildlife Health Unit, please contact wildlifehealth@dec.ny.gov with any additional questions.
Sample shipping and disposal
Corvus has a built-in sample inventory management system. To see the storage units and samples that have been collected from the wildlife health event report submission process, click the Storage Units from the main menu. Search for your Storage Unit using the filter button on the top right.
DEC Regional Sample Shipping and Disposal
If you plan to send stored samples to the Wildlife Health Program (NYSDEC Wildlife Health Unit in Delmar or the Cornell Wildlife Health Lab), there are two ways to do it.
If the samples are all in the same Storage Unit, you can go to that Storage Unit, select the samples to add to the shipment, then click "Perform Action" and choose "Ship". This will create a Shipment record and bring up the Shipment form. Complete the Shipment Form and save it by pressing the OK button at the bottom of the form. When the shipment is complete and ready to be sent, click the "Place Shipment" button.
If you did not have shipping details (Carrier and Tracking number) at the time of completing the form, you can still create the shipment record and "Place Shipment. Once you have tracking information, you may return to the form and click the "Update shipping details" button.
After placing a shipment, the sample records will no longer be present in your Storage Unit inventory and will appear in the destination organization's inventory.
Disposal
Samples discarded or destroyed should be removed from your Storage unit inventory. To do so, go to the Storage Unit in the menuand select the samples to be disposed. In the "Perform Action" menu, choose "Dispose" and provide a disposal date.
Look Up Cases
In Corvus, there are several ways to search for cases and other data. The correct approach will depend on your needs.
Sort and Click
Click "Observation" in the main menu to view all observations. Sort by date by clicking the column name  to see the most recent events. Then click on the submission you want to view.
Filter
Click the filter button ![]() on the top right of the Observations tab list. Filter by date range, Observation ID Number (OID), location (City or County), contact (person associated with submission), or organization that created the submission.
on the top right of the Observations tab list. Filter by date range, Observation ID Number (OID), location (City or County), contact (person associated with submission), or organization that created the submission.
Quick Search
If you know the exact identification number or other cross reference number associated with the event (lab accession number, band number, etc.) you can find it using the Quick search by ID tool in the main menu  . The ID must be typed exactly including letters and symbols (periods or dashes).
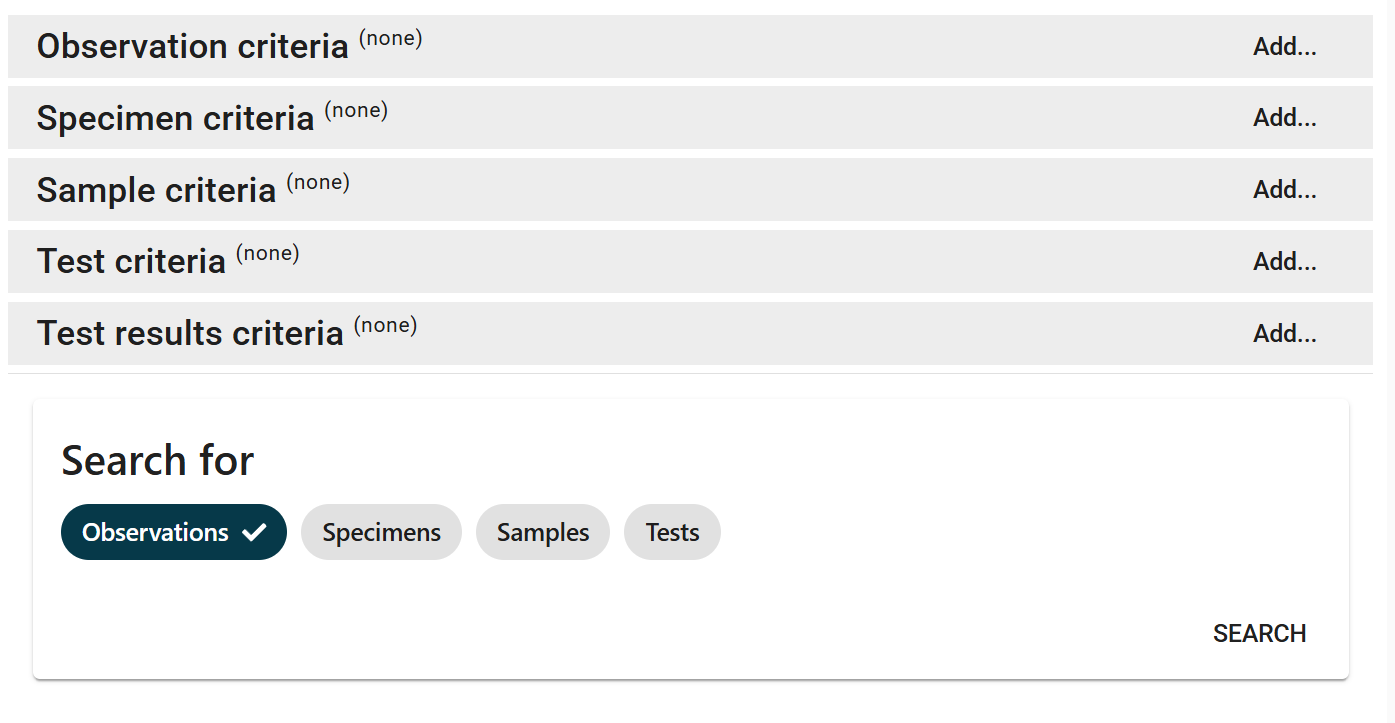
Advanced Search
The Advanced Search can be used to search using more specific criteria. Search results can also be exported.
Public Submissions
Members of the public can only make submissions to Corvus with a unique link sent to them from the Wildlife Health Program. This must be arranged and contact information collected prior to submission. Contact The Cornell Wildlife Health Lab at cwhl@cornell.edu or the DEC Wildlife Health Unit at wildlifehealth@dec.ny.gov with public submission requests.